How to replace mechanical seals in centrifugal pumps?

Can I replace mechanical seals in centrifugal pumps myself?
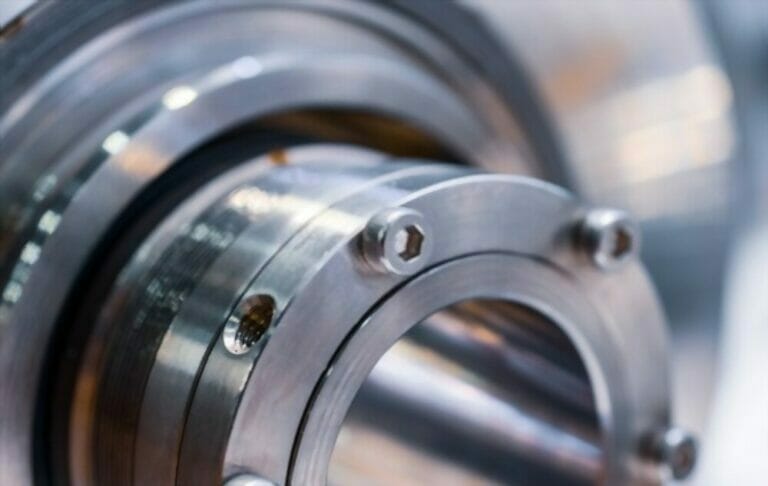
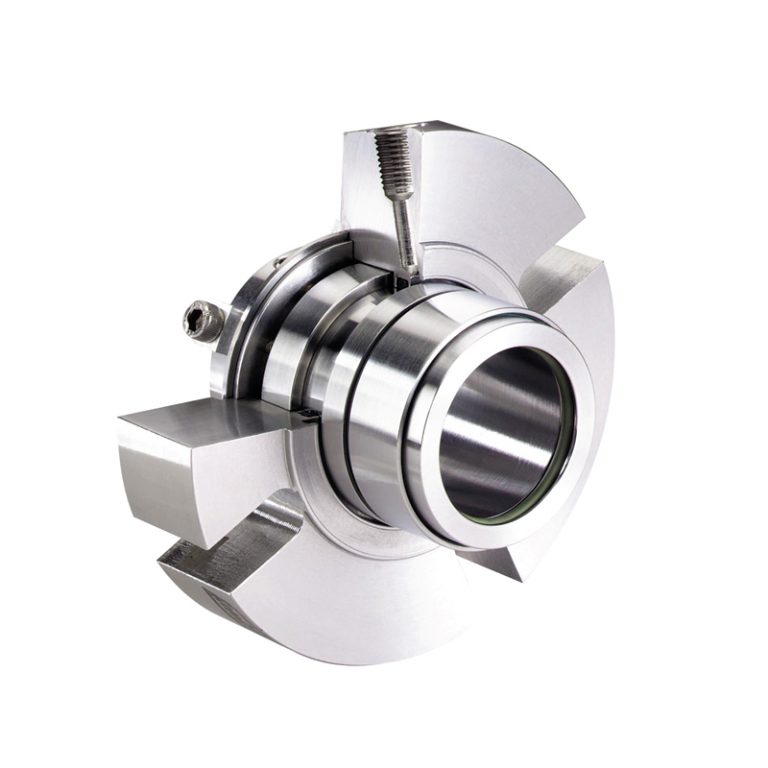
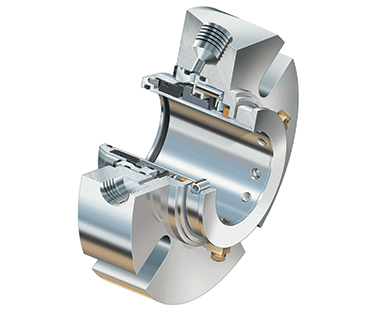
Mechanical seals are used in centrifugal pumps, preventing any leakage of liquids or gases through the rotating shaft of the pump. A damaged or worn-out mechanical seal can lead to pump failure, wasted energy, and decreased productivity. Thus, it is crucial to replace them swiftly to avoid further damage.
While it may sound daunting, replacing the mechanical seal on a centrifugal pump is not a task that requires specialized knowledge or expertise. In fact, it can be done by following a few simple steps.
This article will guide you on how to replace a mechanical seal on a centrifugal pump, ensuring that your pump operates smoothly and efficiently without any leakage issues.
Mechanical Seal Installation Tool
- Seal Setting Gauge or Shaft Sleeve: These are used to measure and set the correct position of the seal on the shaft.
- Anti-seize Compound: This lubricant is used to make it easier to slide the seal onto the shaft and prevent galling.
- Hook or Pick Tools: These can help with removing old seals.
- Installation Sleeves: These protect the seal faces and elastomer parts when sliding the seal onto the shaft.
- Feelers or Gauge: These are used to check and adjust the seal face alignment.
- Seal Driver: This tool is used to evenly apply force to press the seal into place.
- Clean Cloth: It is always necessary to clean the parts before installing the seal to ensure no dirt or debris can cause damage.
Also, keep in mind that beyond the mechanical seal installation tools, you will need basic mechanical tools as well, such as a torque wrench for tightening the gland bolts to the correct torque. Personal protective equipment (PPE) is also essential for safety.
The step by step for replacing mechanical seals in centrifugal pumps
1. Cut the power
Cutting the power in a pump is a crucial task that ensures the safety of workers and prevents any accidental activation or malfunction of the system.
Firstly, locate the circuit breaker that controls the power supply of the pump. It is usually found in the vicinity of the pump, either on the wall or in a nearby control panel. Once you’ve located it, turn off the switch or flip the breaker to the off position, making sure to lock or tag it to prevent anyone from switching it back on. De-energizing the system is critical before conducting any repairs or maintenance on the pump as it eliminates the risk of electrical hazards.
Remember to only restore the power supply once you’ve completed the necessary repairs and carried out routine checks to ensure the pump is functioning correctly.
2. Isolate the fluid
Isolating the fluid from the pump is a crucial step in any maintenance or repair work involving pumps. Fluid isolation involves disconnecting the pump from the system it’s operating in, ensuring that no more fluid can flow into the pump. This is important because it allows for safe and efficient maintenance without risking any leaks, spills, or accidents.
To isolate the fluid from the pump, it’s necessary to close all valves and shut off any other sources of flowing fluid. It’s also important to drain the pump casing and surrounding pipes before proceeding with any work. This ensures that there’s no residual fluid left in the system that could cause potential hazards.
3. Disconnect the centrifugal pump
Remove any bolts or nuts that may hold the pump to the motor or piping. After the pump is free from the piping and motor, detach the electrical connections from the motor to the pump. Finally, carefully lift the pump off of its mounting and place it in storage or transportation.
4. Remove the impeller
The first step is to remove the old one. This involves disassembling the pump and locating the impeller, which is usually located in the center of the pump casing. Once located, the impeller is carefully removed using a wrench or other suitable tool. It is important to take care not to damage the impeller or any other parts of the pump during removal. Once removed, the impeller can be inspected for wear or damage before replacing with a new one.

5. Remove the old mechanical seal
Identify the type of mechanical seal installed on the pump and make note of its orientation and position. Loosen the set screws or clamps that hold the seal in place. Once the set screws or clamps are removed, carefully pull the seal assembly away from the pump shaft.
6. Replace the new mechanical seal
Before mechanical seal assemble, make sure the seal chamber is clean and free of debris. Apply a thin layer of lubricant or silicone grease to the new seal to facilitate installation. It is recommended to wear gloves while working with the freshly installed seals to prevent any potential harm caused by the oils present in our skin (body oil). Don’t touch the front of the seal face. These oils can result in the degradation and subsequent mechanical seal failure at an earlier stage than anticipated.
Install the new seal in the same orientation and position as the old one. Tighten the set screws or clamps to secure the seal in place.
7. Reinstall the impeller
Make sure the impeller is aligned properly and secure it in place.
8. Reassemble the casing
Once the necessary repairs have been made to the device, it is time to reassemble the casing. In order to do this, the original casing bolts need to be used. Care should be taken to ensure that the bolts are tightened securely, but not so tightly that they damage the casing or components inside. It is also important to make sure that the bolts are screwed in straight and evenly, so that the casing sits flush and does not wobble or shift. The use of a torque wrench may be helpful to ensure that the correct amount of force is applied to the bolts. Once the casing is securely in place, the device can be tested to ensure that it functions properly.
9. Reconnect the pump
To reconnect the pump, start by ensuring that all connections and hoses are secure and free of debris. Then, double-check that any valves or switches are set correctly and turned on. Finally, plug in the power cord and turn on the pump to make sure that everything is running smoothly. If you notice any leaks, vibrations, or unusual sounds, immediately turn off the pump and check for any loose connections. Don’t forget to regularly inspect and reconnect your pump to ensure its optimal performance and safety.

What are the important checks that you will carry out before replacing a leak mechanical seal in your centrifugal pump?
Before initiating the procedure, it is necessary to isolate the pump, bleed the lines and drain out any remaining process fluid. The mechanical seal should be carefully chosen to ensure maximum compatibility with the process fluid and minimize corrosion. The shaft, sleeve, and mating surface must be evaluated for wear and pitting, with particular attention given to the elastomers and composites that form a barrier between the fluid and atmosphere. Isolation and spare parts should be readily available since disassembling the pump can pose challenges. It’s also necessary to conduct performance tests after reassembly to ensure that the mechanical seal is functioning well and not affecting the pump’s overall performance. By carrying out these checkpoints, the chances of a successful and efficient pump repair are vastly improved, and the associated recurring costs of mechanical seal replacements can be minimized.
Why is it important to ensure mechanical seals are correctly tensioned?
It is highly important to make sure that mechanical seals are correctly tensioned for a number of reasons. First and foremost, the correct tension ensures that the seal is capable of preventing the leakage of highly hazardous materials flowing through a piping system. A small amount of leakage can have a devastating impact on the equipment, environment, and personnel which is why it’s necessary to make sure that the tension is accurate. Adequate tensioning diminishes the chances of unnecessary mechanical seal wear and tear resulting in equipment failure which can be expensive to repair. On the other hand, excessive tensioning can lead to pump damage and cause an increase in energy consumption. Therefore, it’s essential to maintain the correct balance between not enough and too much tension via regular monitoring to ensure the mechanical seal is operating efficiently.


